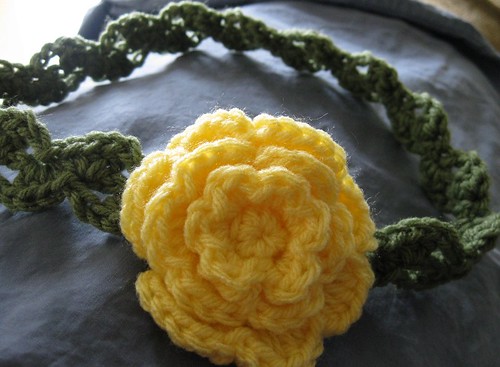
Headbands are lots of fun and they can turn a little girl into a fairy princess quickly. The best headbands are deceptively simple. Here's one that's just begging for a pretty flower!
To make this headband, you first need to measure your head or the head of the cutie you are making it for. Your initial chains will be based on this measurement.
Stitches needed:
double crochet
half double crochet
single crochet
slip stitch
Cluster: DC, HDC, SC in the same stitch, followed by a SL ST in the next stitch, then CH 2.
Leafy headband:
Chain 4 for every inch of your head's measurement + 3 chains.
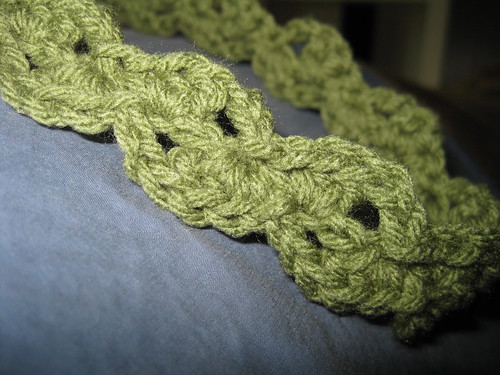
In the 4th chain from the hook, do the cluster (DC, HDC, SC in the same stitch. SL ST in the next stitch). *CH 2. Skip 2 CHs, cluster, (Repeat from * to end). DO NOT TURN.
CH 2 and working around on the other side (DC, HC, SC in the same stitch in the 3rd st. SL ST in the next stitch. *CH 2. Skip 1 CH, cluster. Repeat from * to end. At the end, you will finish with a DC, HDC, SC in the same ST. Put the ends of the band together and SL ST them together (I did two). Fasten off and weave in ends.
Attach your favorite flower or flowers!
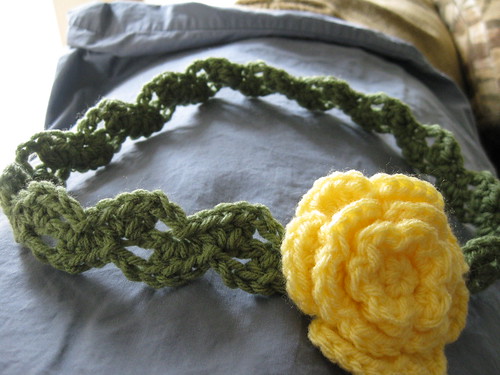
Enjoy!
copyright 2011
Saturday, April 23, 2011
Thursday, April 21, 2011
Testing an Idea
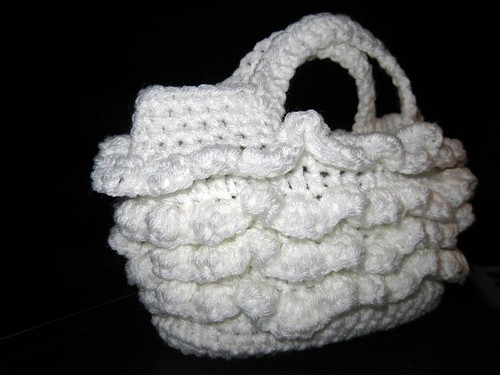
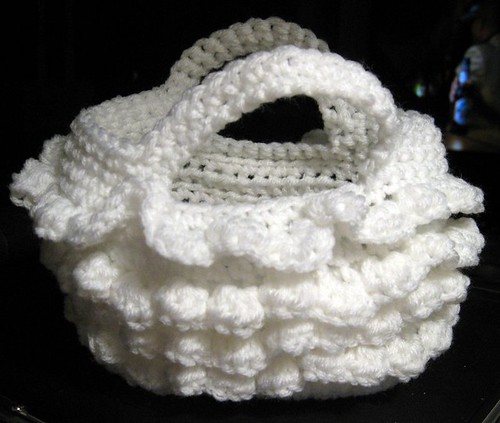
In my head, I have this image of a bag. It's tall and has ruffles. Lots of them. In happy colors.
I've been thinking about the pattern for the past few days and I decided to make a small version to test the stitches I was thinking about.
This is my test bag.
Don't you love the ruffles? Can you just imagine the ruffles on a larger bag?
Oh, I can't wait to start the real one!
I've been thinking about the pattern for the past few days and I decided to make a small version to test the stitches I was thinking about.
This is my test bag.
Don't you love the ruffles? Can you just imagine the ruffles on a larger bag?
Oh, I can't wait to start the real one!
Saturday, April 16, 2011
Ever see something and think: I can make that?
Yesterday, Tangled Happy featured a rose pillow designed by the women over at Two Girls Being Crafty. It is really cute, but their directions seemed rather unnecessarily involved. In the post, they featured a picture of a pillow at Pier 1 that was their inspiration. When I looked at that, I instantly knew how it had been made. My brain would not shut off thinking about starting the pillow.
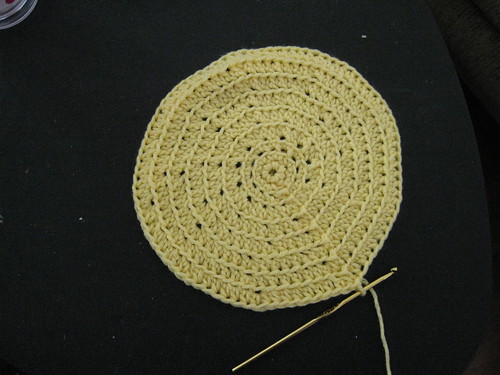
To make the rose/flower pillow, you need to make a circle. Not just any circle, a really big circle. Mine is over 12 inches in diameter. I used a G hook and worsted weight yarn.
Row 1: Chain 2 and crochet 6 sc into the the 2nd chain from the hook. Sl st to complete the round and chain 1.
Row 2: 2 sc in each stitch to the end, sl st to complete the round. Chain 1.
Row 3: *1 sc in next st in back loops only, 2 sc in next st in back loops only*. Repeat to end and sl st to complete round. Chain 1.
Row 4: *1 sc in the next 2 st in back loops only, 2 sc in the next st in back loops only* Repeat to end and sl st to complete round. Chain 1.
Row 5: *1 hdc in next 3 st in back loops only, 2 hdc in next st in back loops only* Repeat to end and sl st to complete round. Chain 1.
Continue each row using hdcs and taking care to crochet in back loops only. In each consecutive row, increase the number of stitches with 1 hdc, followed by 2 hdc in the next st.
My circle has a total of 10 rows. At the end of your final round, sl st to complete round, fasten off.
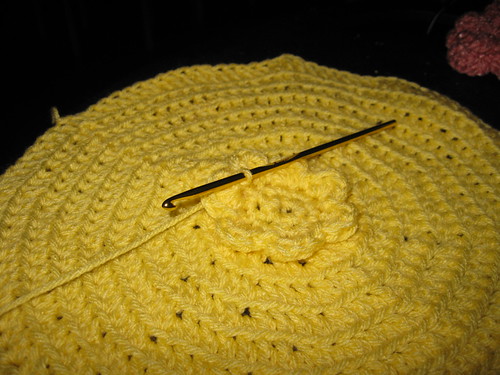
Petals, starting in the row of exposed front loops closest to the center. Slip stitch in one of the loops and chain 2. *Crochet 4 hdc in the same loop, sl st in next loop*, repeat to end. Use this pattern in each row of front loops, sl st and fastening off at the end of the round.
I'm almost done with the petals. Now all I need is a pillow to cover and to crochet the giant circle I will attach as the back to this one. I plan to use the reverse sc to create a border where the two pieces are joined.
Check back soon!
UPDATE: And here it is!
It makes me so happy. It sits on the chair next to my desk at work.
Sunday, April 10, 2011
Adult Football Jersey Hat
After I made Gracie and Lukie's hats, Daddy asked me for one. It took awhile to make sure that it was big enough for Daddy's head and the jersey look fit it.
This is the pattern for the adult size jersey hat.
Begin with Navy Blue yarn.
Ch 4, join to form a ring.
Rnd 1: Ch 1, 8 sc in ring; join to first sc -- 8 sts.
Rnd 2: Ch 1, 2 sc next st and 2 sc in each st around; join to first sc -- 16 sts.
Rnd 3: Ch 1, * 2 sc in next st, sc in next st. Repeat from * around; join - 24 sts.
Rnd 4: Ch 1, sc in next st, * 2 sc in next st, sc in next 2 sts; repeat from * around; join – 32 sts.
Rnd 5: Ch 1, sc in next 2 st, * 2 sc in next st, sc in next 3 sts; repeat from * around; join – 40 sts.
Rnd 6: Ch 1, sc in next 3 st, * 2 sc in next st, sc in next 4 sts; repeat from * around; join – 48 sts.
Rnd 7: Ch 1, sc in next 4 st, * 2 sc in next st, sc in next 5 sts; repeat from * around; join - 60 sts.
Rnd 8: Ch1, sc in next 5 st, * 2 sc in next st, sc in next 6 sts; repeat from * around; join - 72 sts.
Rnds 9-13: Ch 1, hdc in the same space and hdc in each st around; join.
Change color to white yarn.
Rnds 14-15: Ch 2, sc in each st around; join.
Change color to orange yarn (I used "Carrot" by Red Heart).
Rnds 16-18: Ch 2, hdc in each st around; join.
Change color to white yarn.
Rnds 19-20: Ch 2, sc in each st around; join.
Change color to navy blue yarn.
Rnds 21-22: Ch 2, hdc in each st around; join.
Fasten off.
Weave in ends.
Friday, April 8, 2011
Because Gracie tried to steal my bag
Thursday, April 7, 2011
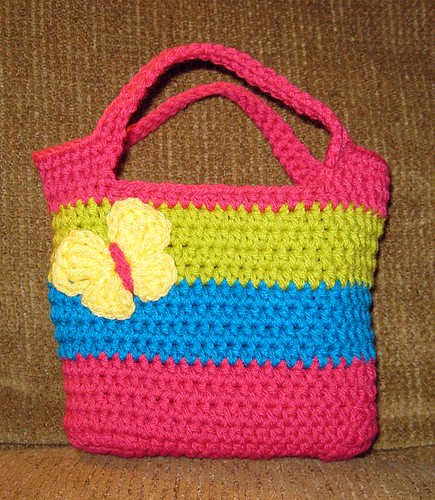
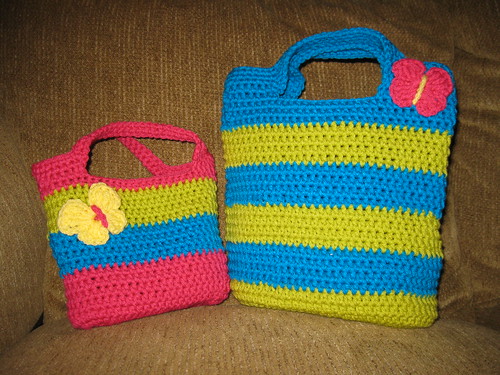
Spring Stripe Bag
Yesterday's Flower Burst Bag inspired me to design a bag of my own. The Flower Burst Bag does not have a flat bottom, so it really can't stand on its own. That has been kind of frustrating (even though I seriously love that bag).
Last night, I started playing with the idea of a flat bottomed bag by making a long oblong shape.
You can see how the rows keep circling the center. I started with a chain of 13 and crocheted 2 sc in the 2nd stitch from my hook and 1 sc in each of the next 10 stitches. In the 11th stitch, I crocheted 2 sc, chained 1, crocheted 2 sc on the other side of the chain. I continued down that side, 1 sc in the next 10 and 2 sc in the 11th space. Then, I slip stitched to close the oblong shape. Then, I chained 1, 2 sc in the next 2 stitches, 10 sc, 2 sc in the next two stitches, 2 sc in the end stitch, 2 sc in the next two stitches on the other side, 10 sc and 2 sc in each of the end stitches with a sl st to close.. It gets a bit more complicated the more layers you have, but basically, the end turns always have 2 sc in each stitch to help the curvy turn and there is 1 sc on the straight sides. On Row 4 and beyond, I continued the pattern, but instead of chain 1 and single crochets, I switched to chain 2 at the beginning of the row and half double crochets. Once the base was as large as I wanted it to be (Row 6), I began crocheting one hdc in each stitch around and slip stitched to end each row. This began the shape of the bag.
After I completed 8 total rows of green, I switched to the aqua color and crocheted 4 rows of hdcs. I repeated the 4 rows of hdcs of alternating colors until I decided it was tall enough and then I did 3 rows of hdcs and began my handles. I did the same handles as with the Flower Burst Bag yesterday.
Ta-da!
You can find the pattern for the butterfly at Little Birdie Secrets blog. They are totally easy and so quick to make that I can make one in about 3 minutes.
Don't you love this bag? I was thinking of giving it to someone, but I think I am going to use it as my purse!
Wednesday, April 6, 2011
The Flower Burst Handbag
After my Hex-y Tote bag, I got a little excited about bags. I found a lot of free patterns, but the Flower Burst Handbag intrigued me. It is made with a whole lotta single crochets, but has a band of open flowers around the center. It's adorable!
The original bag on The C Side blog was a solid green and absolutely fantastic. It is perfect for a vacation or a trip to the beach. The bag is unlined so you can see through the flower motif.
The pattern was fairly simple, but I lost count somehow and ended up with more flowers than could fit in the base of my bag. I also lost count above my flowers and had to wing it a bit. Hopefully, the result isn't too off what the designer intended.
I decided to use some coordinating colors I found at Michael's: purples, greens. Don't you love the colors? Overall, I'm very happy with the outcome!
Take a trip over to The C Side to see her other designs.
Tuesday, April 5, 2011
Another Flower Scarf
Because I'm in love with flowers and scarves in particular, I decided to make another scarf similar to the chain scarf, but with a solid scarf portion. What do you think? I love it because it can be worn loosely or up close to your neck easily.
To make this scarf, you will begin the same way as the Flower Chain Scarf.
Flower Scarf #2
Stitches
sl st = slip stitch
sc = single crochet (scs = single crochets)
hdc = half double crochet
dc = double crochet
Flower:
Chain 15. Sl st to close chain.
Row 1: SC over ring 25 times. Sl st in top of 1st SC.
Row 2: Chain 3. Skip 1 stitch and SC in next stitch. Repeat until you reach first chain.
Row 3: Sc into loop of first chain 3. In same loop, 1 HDC, 2 DC, 1 HDC, 1 SC. Repeat in each loop around (SC, HDC, 2 DC, HDC, SC). .
Row 4: Working behind Row 3, insert hook from BACK to front, around the post and into the next hole from front to back. Yo and pull thru both holes and SC. *Chain 4 and SC around next post. Repeat from * around/behind the first row of petals. Finish with slip stitch in 1st chain.
Row 5: In first loop, SC, HDC, 3 DC, HDC, SC. Repeat in each loop around. Slip stitch in first SC to finish row.
Optional: Repeat rows 4 and 5. Flower complete!
Now, let's start the scarf part! Slip stitch down along the posts to original ring. You should be at the back of the flower.
*Note: The first two rows of the scarf portion should be in the same color as the flower so that it does not show through.
Row 1: Single crochet in each of the next 10 stitches along ring. Chain 1, turn.
Row 2: SC in same stitch and in next 9 spaces across If you plan to switch colors, fasten off.
Row 3: Join your new yarn and and chain 2. DC in each of the 10 spaces. Chain 3 and turn..
Row 4-60: Repeat row 3. If you would like your scarf (or belt!) longer or shorter, you can increase or decrease your rows of DCs.
Fasten off and weave in ends.
Enjoy!!
Tie a knot right under where you want the flower to stay! |
Flower Scarf #2
Stitches
sl st = slip stitch
sc = single crochet (scs = single crochets)
hdc = half double crochet
dc = double crochet
Flower:
Chain 15. Sl st to close chain.
Row 1: SC over ring 25 times. Sl st in top of 1st SC.
Row 2: Chain 3. Skip 1 stitch and SC in next stitch. Repeat until you reach first chain.
Row 3: Sc into loop of first chain 3. In same loop, 1 HDC, 2 DC, 1 HDC, 1 SC. Repeat in each loop around (SC, HDC, 2 DC, HDC, SC). .
Row 4: Working behind Row 3, insert hook from BACK to front, around the post and into the next hole from front to back. Yo and pull thru both holes and SC. *Chain 4 and SC around next post. Repeat from * around/behind the first row of petals. Finish with slip stitch in 1st chain.
Row 5: In first loop, SC, HDC, 3 DC, HDC, SC. Repeat in each loop around. Slip stitch in first SC to finish row.
Optional: Repeat rows 4 and 5. Flower complete!
Now, let's start the scarf part! Slip stitch down along the posts to original ring. You should be at the back of the flower.
*Note: The first two rows of the scarf portion should be in the same color as the flower so that it does not show through.
Row 1: Single crochet in each of the next 10 stitches along ring. Chain 1, turn.
Row 2: SC in same stitch and in next 9 spaces across If you plan to switch colors, fasten off.
Row 3: Join your new yarn and and chain 2. DC in each of the 10 spaces. Chain 3 and turn..
Row 4-60: Repeat row 3. If you would like your scarf (or belt!) longer or shorter, you can increase or decrease your rows of DCs.
Fasten off and weave in ends.
Enjoy!!
Monday, April 4, 2011
The Flower Scarf
A friend from work came to me with a challenge. She had seen a scarf at a craft fair that was totally cute and she wanted one, but wasn't willing to pay the $20 the seller wanted. She described the scarf to me and asked if I might be able to figure it out. It was a flower scarf. The flower was big and there were chains of yarn that hung from the flower. The chains were wrapped around your neck and then through a hole in flower to hold the scarf around your neck.
It sounded doable, so I came home that night and went to work. I did not take a picture of my prototype, but I have the finished pattern I designed for Nikki and pictures of two of the approximately 20 I've made since then. I can't help it. I'm obsessed.
Here's the pattern I designed for The Flower Chain Scarf:
Stitches
sl st = slip stitch
sc = single crochet (scs = single crochets)
hdc = half double crochet
dc = double crochet
Flower:
Chain 15. Sl st to close chain.
Row 1: Sc over ring 25 times. Sl st in top of 1st sc.
Row 2: Chain 3. Skip 1 st and sc in next st. Repeat until you reach first chain.
Row 3: Sc into loop of first chain 3. In same loop, 1 hdc, 2 dc, 1 hdc, 1 sc. Repeat in each loop around (sc, hdc, 2 hdc, sc). .
Row 4: Working behind Row 3, insert hook from BACK to front, around the post and into the next hole from front to back. Yo and pull thru both holes and sc. *Chain 4 and sc around next post. Repeat from * around/behind the first row of petals. Finish with sl st in 1st chain.
Row 5: In first loop, sc, hdc, 3 dc, hdc, sc. Repeat in each loop around. Sl st in first sc to finish row.
Optional: Repeat rows 4 and 5.
Sl st down along post to original ring. You should be at the back of the flower. Single crochet along ring 10x. Chain 1, turn. Sc in same st. Repeat sc in next 9 spaces.
Chains:
At end of last row of scs, you will begin your chains. The number doesn't really matter, but here are some things to think about:
Chain 200 for girls.
Chain 300 for adults.
Remember that this chain will actually be half as long when you finish because it is giant loop.
Make your chain. At end of chain, sc in next sc space on flower. Chain 2the same number, sc in next sc space on flower. Repeat to the end of sc spaces. Fasten off and weave in end.
Enjoy!
Sunday, April 3, 2011
It's a Cupcake Purse!
I love having a little girl. She watches me crochet and asks me "Are you making something for me, Mommy?" When I do, she will wear it for hours. She has two scarves and three hats. All of them make the rounds each day and she loves them because they are clothing she can put on all by herself.
Recently, she could not find her little Dora purse that she loves so much. She came to me with her sad little face and said, "Mommy, I don't have a purse! Where do I put my toys?"
So, I decided to see if I could find the ultimate girly purse. In my search, I found a pattern for a cupcake purse. Yup! A cupcake purse! The pattern I found was available for free at Crochetville. You may have to join to see it, but it is well worth the free membership!
You start with a base:
Then, you crochet the frosting and straps:
Don't you just love it? I can't wait to give it to Gracie!
The Girly Team Beanie
Gracie wanted a Bears Beanie, too, so I set out to find a pattern for her. As I was going through my yarn, I came across a puff stitch beanie pattern on my Impeccable yarn from Michael's Loops and Threads line. It claimed it was a for a small girl's head, so I decided to make it and see how it came out.
It was super easy to make. The puff stitches went quickly and changing colors was not a problem. It has a very different look from Luke's hat so they can tell the difference easily. The sizing is too big for Gracie's peanut head, though. It isn't kidding when it says it is for a size 6-8 child.
I followed their pattern creating 5 rows of navy blue puff stitches, 1 row of white, 2 rows of orange, 1 row of white, 2 rows of navy blue, finishing with a row of single crochets for the brim. Like I said, it's pretty big, but it will last for a while.
Saturday, April 2, 2011
Team Beanie
Months ago, I promised Gracie and Luke Chicago Bears beanies so that they could be like their Dad on game day. Monday, Luke came to me and said, "Mommy, you promised to make me a hat. When can I have it?" Mom fail.
I've made a gajillion scarves and hats for other people, but I haven't had time to make hats for my own children.
So, I set out to find a pattern that would fit Luke's head and would work well with the colors on the Bears' away jersey.
Monday, I finally had time to focus on his hat and found this pattern to help me with it. It's a fine hat. Easy pattern, for a boy's hat.
Here's the thing. The pattern calls for double crochets at one point and I wasn't liking the way the hat was coming out. I tore out about 5 rows of stitches and started again with half double crochets. I loved the way it looked.
To achieve the effect of the Bears' jersey stripes, I switched to single crochets for the white stripes and back to half doubles for the orange stripe.
Ta da!
Lukie's Chicago Bears Jersey Hat
Begin with Navy Blue yarn.
Ch 5, join to form a ring.
Rnd 1: Ch 1, 11 sc in ring; join -- 12 sts.
Rnd 2: Ch 1, sc in same st as joining, 2 sc in each st around; join -- 24 sts.
Rnd 3: Ch 1, * 2 sc in next st, sc in next st. Repeat from * around; join - 36 sts.
Rnd 4: Ch 1, sc in next st, * 2 sc in next st, sc in next 2 sts; repeat from * around; join – 48 sts.
Rnds 5-11: Ch 2, hdc in each st around; join.
Change color to white yarn.
Rnds 14-15: Ch 2, sc in each st around; join.
Change color to orange yarn (I used "Carrot" by Red Heart).
Rnds 16-17: Ch 2, hdc in each st around; join.
Change color to white yarn.
Rnds 18-19: Ch 2, sc in each st around; join.
Change color to navy blue yarn.
Rnds 20-21: Ch 2, sc in each st around; join.
Fasten off.
Weave in ends.
Luke loves his hat and wants to wear it all the time! Now, he's just like his Daddy!
Friday, April 1, 2011
Hex Tote Bag Tada!
3 days! I'm not sure how many hours, but it has been 3 days from start to finish.
A couple of tips and tricks:
I'm so glad I tackled this bag. I've never done anything like it and I know my sister will like it when I give it to her for her birthday tomorrow!
Originally, I added this strap cover to the design, but it was kind of over kill, so I took it off. |
So you can get an idea of the size of this thing. It is pretty massive! |
- I took a canvas shopping bag and used it as the lining of my bag. Pre-sewed!
- I sewed the crochet portion to the canvas bag at the top of the bag, both plain sewing and whip stitches around the top of the bag.
- Rather than use the crocheted straps to cover the canvas straps, I used yarn to embroider designs into the canvas with my tapestry needle. None of the stitches is uniform. They are a tad haphazard and I really like it that way!
I'm so glad I tackled this bag. I've never done anything like it and I know my sister will like it when I give it to her for her birthday tomorrow!
Subscribe to:
Posts (Atom)